Let’s get back to food crafty business!
Today we’re combining two of my passions, fungi and pickles, aka., lacto-fermentation! If it’s more comfortable, you can just think of it as delicious kitchen science! The difference between most pickles you buy at the store and lacto-fermented pickles is most modern pickles are made using by processing vegetables in a hot brine made with some combination of vinegar, salt, spices and sometimes sugar. The latter, traditional lacto-fermented pickles, are made by putting vegetables (or even fungi!) through a fermentation process, where the yeasts that are on their surface are allowed to digest their sugars over time, again in a salt brine solution, without oxygen which makes its own vinegar and preserves the vegetables in the process. Amazing, right?! And these things are more than just delicious, by providing tons of bioavailable nutrients and probiotics, they’re even ridiculously good for your health!
 Because of the food preservation and health benefits, lacto-fermentation has strong (often smelly) roots in traditional, nourishing food cultures all over the world, from kimchi to poi to garums! This means that pickling is always welcome in my kitchen as a gateway to experimentation, another must have in a vibrant, healthy relationship with food and life!
Enough background, let’s get into what I did!
Here’s what I gathered up from around my kitchen to make this mess/edible miracle:
Hardware:
- Instant Pot or pot large enough for Brine + Mushrooms
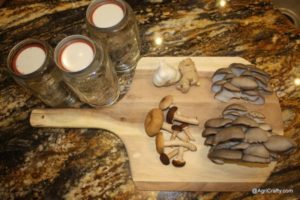
- 4 wide-mouth quart jars
- food grade plastic wrap
- 4 narrow mouth canning jar lids
- canning funnel
- My mitts and keen wits!
Ingredients:
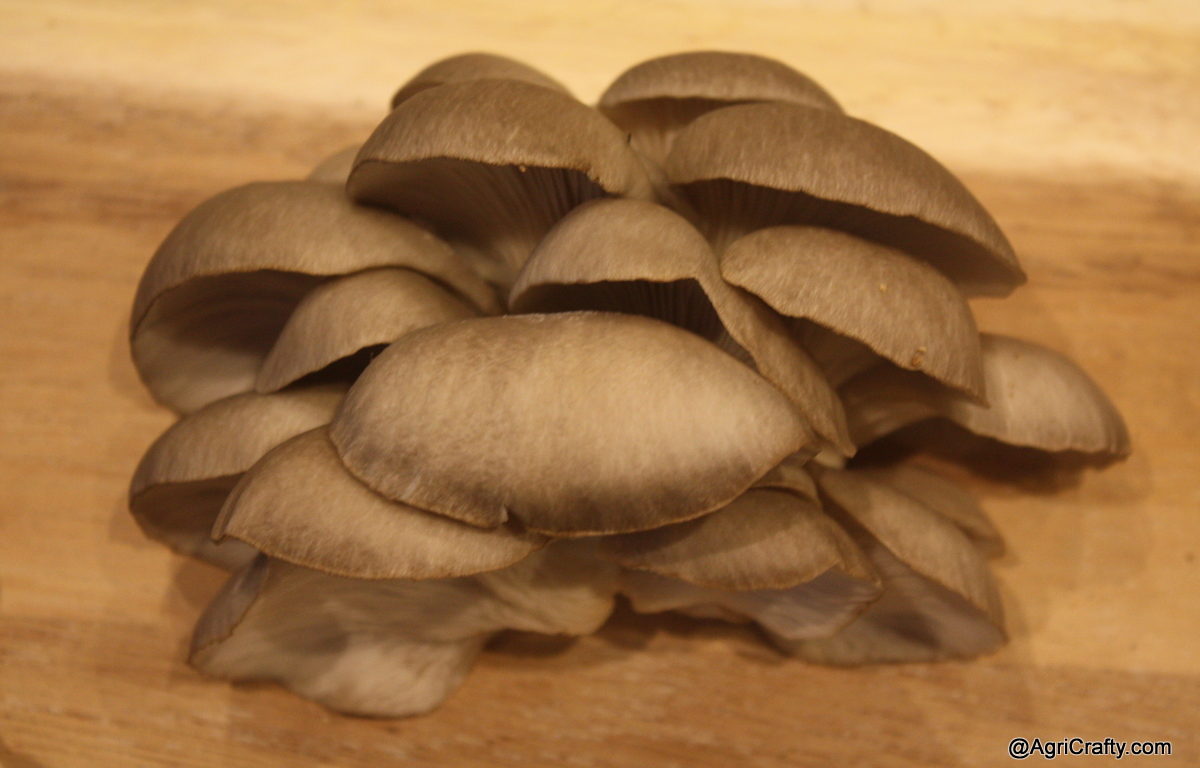
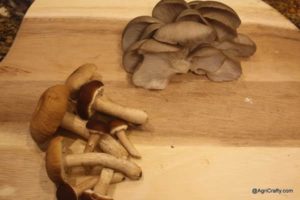
- ~1kg/2.2lbs of Oyster Mushrooms with a few Pioppinos thrown in from my friends at Myco Alliance here in Austin, TX
- 2-4 Garlic cloves
- several sprigs of loose dried whole Dill (dill seed is a common substitute)
- whole Peppercorns
- 1 fresh Ginger knuckle
For the brine:
-
2 L filtered water
-
60g kosher salt
-
(Yields 3% salt brine)
-
Pressure cooked brine for 10 mins to dissolve salt and sterilize.
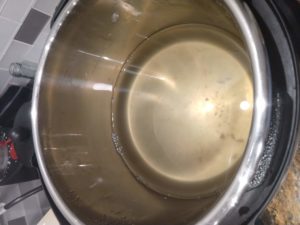
- Note: this isn’t usually necessary or even recommended, some local flooding has Austin under a water boil notice because of too much sediment in the city water filters, so I wanted to keep any baddies out. Usually it is sufficient to heat the water just enough to dissolve the added salt.
-
Clean and slice mushrooms (they are easier to handle when left in pieces about the size of a pickle spear)
-
After brine reached a boil, removed from heat
-
Added sliced mushrooms to hot water and covered with no heat for 1hr
- This is a step unique to mushrooms, giving the hot water a chance to break down the chitin in the fungal tissues!
- Beware: Use Heat with Caution! Sterilizing can significantly set back or completely prevent fermentation!
-
Decant and save/set aside mushroom brine in covered pot to cool
-
Pack mushrooms and spices into jars (for experimentation purposes, I made one control and spiced the other)
-
Garlic, 1-2 cloves per jar, peeled and smashed
-
Dill
-
Peppercorns
-
Sage?
-
Ginger
-
-
Added piece of raw/non-heat treated mushroom to each container to guarantee inoculation with surface yeasts for fermentation
-
Filled/topped off jars the remainder of the way with set aside mushroom brine, tamping with a wooden spoon or other poking thing to get the air bubbles out
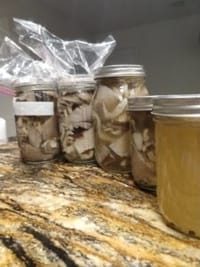
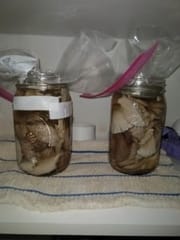
- Topped each jar with a DIY homemade lid to let CO2 bubbles from the fermentation process out while holding the mushrooms below the surface of the brine
- Took pictures for the ‘gram and the blog
- Put jars on a towel (to catch any fizzy overflow later on) in a safe, cool, dark place where they won’t be disturbed and can bubble away in peace for the next few weeks
Now we wait!
The Fermentation Waiting Rules:
- Take Notes! Good notes make great recipes!
- Use your senses
- As a sense, tasting is allowed
- Bubbling is good!
- Sometimes things overflow, see #3
- Fuzzy stuff is bad and should be removed!
- Keep everything safe from molds below the waterline!
- Be patient
After a few days, you should notice the bubbling start as your little critters start to do their work, eating sugars and breathing out CO2 (carbon dioxide).
After a couple of weeks, sooner if they are somewhere warm, longer if they are somewhere cooler, you will notice the salty sweet taste of the brine start to shift to a more sour taste as the pH drops, meaning that it is becoming more acidic. It’s that acid that does the preserving and unlocks so many wonderful flavors!
This whole process, like most of the projects meandering between my garden and kitchen, is part of how I take care of myself, mind, body and soul. Making, growing and eating a homemade cornucopia keeps me pushing the edge of what I know how to make. Ongoing experiments also keep me interested exploring different sides of the same ingredients by casting them in new roles in my diet or garden.
Good Luck and Stay Curious!
E